Ikea Kullen 6 Drawer Dresser
I love putting together Ikea furniture and enjoy giving tips to others on how to do so.
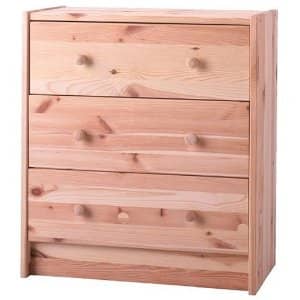
A great dresser for a great price.
IKEA Rast Assembly Instructions
I love the quality of Ikea furniture. The Ikea Rast 3 drawer chest dresser is no exception. This dresser is a perfect size for a kids room and is made from solid wood. The one thing I don't like about Ikea is their instruction sheet. While the pictures are great, they really don't go into detail about how to put this beautiful dresser together. That's why I have put together this little set of instructions for the Ikea Rast 3 drawer chest dresser. Before putting this together, I recommend staining or painting the face of all the wood pieces. The wood is unfinished. I prefer staining over painting because it brings out the natural beauty of the wood, which is why I like wood furniture. Once you stain or paint the pieces for the Ikea Rast 3 drawer chest dresser, it is time to put it together.
- Sheets or towels
- Block of wood
- Hammer
- Wood glue
- Cordless screwdriver with hex and Phillips bit
- Flat-head screwdriver
Preparation
Separate all of the hardware for the Ikea Rast 3 drawer chest dresser. You have nine different pieces of fastening hardware along with the various wood pieces and the drawer rails. There is a little tool that comes inside the hardware bag. Throw it away. It is useless.
Lay a sheet or some towels on the floor where you are assembling the dresser. This helps protect the floor and also protects the wood of the dresser.
Assemble the Sides
- Lay the two sides of the dresser face down on the floor next to each other. The top of the sides has five holes. The bottom of the sides has three holes on one side. When laying the sides next to each, the tops should point in the same direction with the holes on the bottom pointing away from the opposite side panel.
- Place the drawer rails onto the slots on the side panels. You will clearly see where the rails attach.
- Place a small block of wood on the top of the rail and tap the wood with a hammer to seat the rail into the wood.
- Repeat for all six rails.
Install the Top Section
- Apply a dab of wood glue into the three center holes on each end of the top section. The wood glue helps provide more sturdiness to this already sturdy piece of furniture.
- Insert a wooden dowel into each hole and gently tap the dowels with a hammer until they sit fully into the holes. Be careful not to mushroom the end of the dowel.
- Place one of the sides on its edge with the three holes on the bottom inside of it pointing up. The top of the side section should be pointing away from you.
- Put glue into the three center holes of the side panel at the top. Align the dowel ends on the top section with the side panel holes. Push the top section dowels into the side panel until the top section is flush against the side panel.
- Thread a hex head screw through the outside face of the side panel into the ends of the top section with a cordless screwdriver and hex bit. This requires some force which is why the tool Ikea supplies is worthless.
Assemble Support Boards
- Apply glue to the holes on each end of the narrow support boards. There are two narrow boards. Insert a wood dowel into each hole and seat them as you did the ones in the top section.
- Place the side panel face down with the top section pointing up in the air. When rotating the side panel over, hold the top section to prevent stress on the dowels and two screws securing it to the side.
- Align one narrow board over the two holes near the center of the side panel. Tap the board lightly with a hammer until it is flush against the side. There are three holes; two that only go halfway through the side panel and one that goes all the way through. You are installing into the half-drilled holes.
- Place the remaining narrow board over the two half-drilled holes on the bottom of the side panel. Once again, tap the board lightly until it is flush against the side section.
Assemble the Second Side Section
- Position the second side section over the ends of the dowels of the top section and two narrow boards. Gently tap the section over the dowels with your hand until it is flush against the ends of the top section and narrow support boards.
- Thread the hex head screws through the face of the side section and into the end of the top section and support boards with the cordless screwdriver.
- Turn the assembly over and install the remaining screws through the face of the opposite side and into the ends of the narrow support boards.
Assemble the Back
- Flip the dresser over so the face is on the floor and the back is pointing up. The center support board should be pointing up.
- Position the back of the dresser over the top half of the dresser frame.
- Nail the back to the dresser with the supplied finishing nails and a hammer. There are small dimples along the perimeter of the back piece. The dimples are where the nails install.
Assemble the Drawers
- Place all three drawer fronts face down. Thread the screws that resemble a wall anchor into the two holes on the inside face of each drawer face end with the cordless screwdriver and Phillips bit. The center hole on each end is for a wood dowel.
- Insert a wood dowel into the center of each end of the drawer side panels. Position a side panel on each end, with the groove on the side panel pointing toward the center of the drawer and in the same direction as the groove on the drawer face. Repeat for all three drawers.
- Insert the narrow grooved washers into each hole on the face of the drawer side panels. These washers thread over the heads of the drawer face anchor screws. Turn the washers clockwise with a flat-head screwdriver to secure the drawer sides.
- Slide the drawer bottoms into the grooves on the drawer sides and drawer face. Position the rear panel over the rear of each drawer. Tap the threaded nails through the holes on the back of each side panel and into the ends of the drawer rear panel.
- Set the drawers on their bottoms and install the drawer pulls. Insert the threaded screws through the holes inside the drawer face and thread the drawer pull onto the screw until tight. Insert the drawers into the Ikea Rast 3 drawer chest dresser.
Scroll to Continue
Andrew on January 05, 2014:
We are a professional IKEA shopping, delivery and assembly service (www.easyflatpax.com) in Spain on the Costa Blanca. The instructions given here by kenwrites are spot on. Anyone considering building IKEA stuff themselves should know it's a case of following the instructions they give to the letter. However, they can be confusing, so thanks to kenwrites for this very helpful article.
Ken Crawford (author) from Yreka, California on January 06, 2012:
LOL Thanks dipless :)
Ken Crawford (author) from Yreka, California on January 06, 2012:
Thank you radhikasree. :)
dipless from Manchester on January 06, 2012:
Oh i didn't know that, a great guide then, very helpful :D
Radhika Sreekanth from Mumbai,India on January 06, 2012:
These instructions are very helpful. Anyone can assemble a dresser using this informative guide. Voted up as useful.
Ken Crawford (author) from Yreka, California on January 06, 2012:
No, you get directions...the ones that are in the first link. Strictly pictures. Sometimes the picture only directions don't give you the necessary info you need. :) Like the tool they give really is worthless unless you don't mind blisters in the palm of your hand..lol
dipless from Manchester on January 06, 2012:
Surely you get these with the draws, although I guess it's useful if you lose them :D
Source: https://dengarden.com/interior-design/Ikea-Assembly-Instructions-for-Rast-3-Drawer-Chest-Dresser
0 Response to "Ikea Kullen 6 Drawer Dresser"
Post a Comment